Getting Started with Sagenverse
- Ben Mazza
- Mar 6
- 4 min read

🧭 Welcome to the 3D Editor
Once you've chosen a template and named your Sagen, you'll enter the 3D Editor. This is where the magic happens! Your entire space is fully interactive and built in real-time 3D. Everything you see, from the walls to the objects, can be customized.

The Main Interface
Along the left margin of your screen, you'll find several key tabs that help you build and manage your Sagen. Let's take a look at those:
🕹️ 3D Navigation: Getting Around
Navigating the 3D space is simple and intuitive. Here’s how to move through your scene:

WASD or Arrow Keys: Move forward, backward, and side to side. (Q and E to rotate)

Left Click + Drag the Mouse: Look around by holding the left mouse button and dragging the screen.

Click to Walk: Click directly on the floor to move your avatar to that spot. This helps you quickly reposition without keyboard input.

Select Objects: Click on any item in the scene—like furniture, files, or text—to select and begin editing it. Learn more about editing 3D objects here.
📂 Adding Files to Your Sagen
Your content is the heart of your Sagen. Whether you're uploading images, documents, audio, or interactive media, the Files tab is your go-to spot for managing it all.

Ways to Add Files
There are several easy ways to bring content into your space:
Drag and Drop from Your Computer: Simply drag files from your desktop or folders right into the browser window. They'll be uploaded automatically and added to your Files tab.
Copy and Paste: You can also copy images or text from your computer and paste them directly into your Sagen using standard keyboard shortcuts. (Control or Command + C to Copy, Control or Command + V to Paste) Note - this also works for links from the web.
Drag from the Files Tab: Once uploaded, your files appear in the Files tab. Drag any file from there into the 3D scene to place it.
Drag Files into 3D Objects or Frames: Want your content to appear inside a display frame or on a virtual screen? Just drag the file directly onto the target object. The system will auto-fit it for you!

🗒️ Any file you add to your Sagen is automatically added to your files tab.
💡 When you add any new files to your Sagen, there is a brief processing delay that will display a temporary image. This image is automatically replaced with the proper thumbnail once the file is fully processed (this can take up to 30 seconds in some cases).
🛋️ Adding Furniture and Props
Let's add some personal touches to our space with decorations and props. Let's talk about the furniture tab.

Sagenverse offers hundreds of free 3D models and props to customize your projects. Many of these items can be further customized with your files and colorization controls.

To locate the furniture you're looking for, you can use search (keywords and names) or you can use the filter dropdowns to quickly browse the different furniture collections.
To add a new piece of furniture to your room, simply drag and drop it from the palette menu into the room (just like you did for your files).
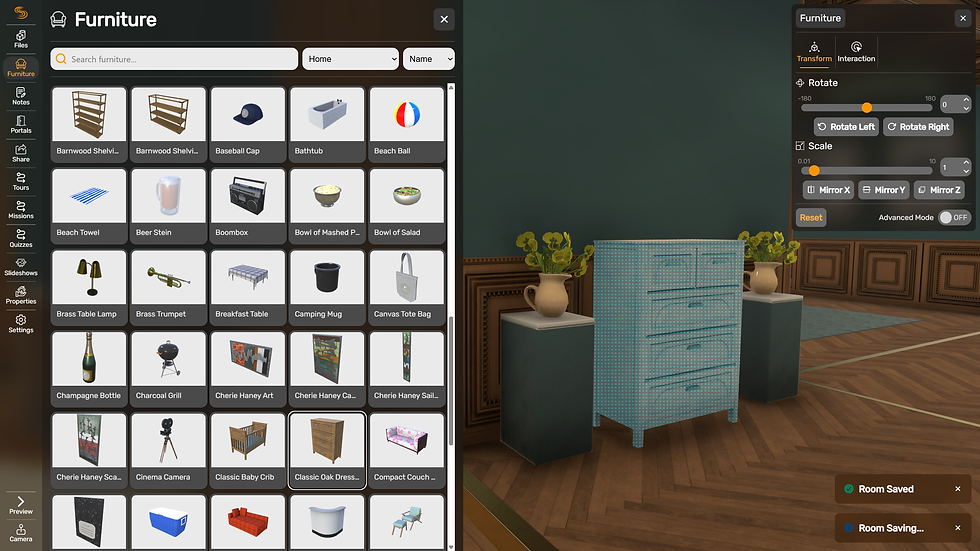
Once placed and selected, you'll notice a new menu appears - this is the properties menu. Let's briefly discuss how it works.

Transform Tab
This tab controls the position of the object in the project.
Rotate: Drag the slider to change the object's rotation from -180 to 180 degrees. You can also type the number into the box to the right for precision values.
Quick Rotate Left and Right: These quick rotate buttons will snap rotate the object 45 degrees left and right.
Scale: Scale drives the overall size of the object between 1% and 1000%.
Quick Mirror Buttons: These buttons will mirror the object on a 3D axis—handy for flipping the shape of objects.
Advanced Toggle: Enables advanced transform controls.
📢 Sharing Your Work
You've added your files, arranged your project, and are now ready to share it with the world. Let's get into the publishing and sharing menu.

Sharing your work is as simple as pressing the Publish button and confirming by pressing Publish Room.

This will save your project and set up a couple of new items in the sharing menu.

Public Link: This link is a public link to your published Sagen—you can post this anywhere, enabling guests to view your project!
Embed Code: Use this script on your favorite web editor of choice to add an iframe link to your project on any webpage.
Unpublishing: Clicking this button will result in your public link and iframes being destroyed. This is not undoable, so please be aware if you've previously embedded or shared this Sagen.
Making Updates and Edits: Sagenverse enables you to keep working on your project while it's published. You can safely release new versions of your project anytime by simply pressing the Publish button again. This will replace your currently published version with your new one.
By following these steps, you can create a stunning gallery that captivates your audience. Remember, the key to a great experience is to keep it interactive and engaging. Happy creating!
